Monday, August 21, 2017

Hot Fudge Sauce Recipe

Ingredients
1/2 cup butter
2 ounces unsweetened chocolate
1/2 cup Dutch processed cocoa, sifted
1/2 cup sugar
1 1/4 cup heavy cream
2 teaspoon vanilla
1/2 teaspoon salt, optional

Instructions
Melt butter and chocolate in a heavy saucepan over low heat.  Stir constantly, making sure it doesn't burn.  Add half of the heavy cream and all of the cocoa.  Turn heat to medium low and stir until there are no lumps (sifting cocoa makes this easier).  Stir in the remaining cream until smooth and thick.  Remove from heat and mix in vanilla and salt.

Chocolate Chip Walnut Cookie Skillet Recipe

Ingredients
2 cups all purpose flour
1 1/2 stick butter, softened
1 cup dark brown sugar
1/4 cup granulated sugar
2 large eggs
3/4 cup semisweet chocolate chips
3/4 cup dark chocolate chips
1/2 cup walnut pieces
1 1/2 teaspoon vanilla
1/2 teaspoon baking soda
1/2 teaspoon kosher salt, optional

Instructions
Preheat oven to 375F.  Cream together the butter, dark and granulated sugars, and half of the salt until no large lumps remain.  Stir in the eggs and vanilla.  Then and the flour and baking soda and mix well, until the dough comes together.  Stir in ~3/4 of the chocolate chips and walnuts.

Scrape batter into a 10" cast iron skillet.  Pat batter into skillet, making an even layer so that the dough extends to the sides of the pan.  Scatter the remaining chocolate chips and walnuts on top, and sprinkle with remaining sea salt.

Bake until outer edges slightly browned, about 20 minutes.  Let cool for at least 5 minutes before serving.

Ice Cream Sandwich Recipe

Ingredients
1/2 sticks butter, melted and cooled slightly, + more room temperature butter for pan
1 cup all purpose flour
3/4 cup cocoa powder
3/4 teaspoon baking powder
1/2 teaspoon coarse salt
1 cup granulated sugar
2 large eggs
2 teaspoons vanilla
2 pints ice cream

Instructions
Heat oven to 350F.  Butter 13x18" rimmed baking sheet and line with parchment paper (buttering the pan makes the parchment paper stick so it doesn't move around when you pour on the batter).

Combine all dry ingredients.  In a separate bowl, whisk together melted butter and sugar until creamy.  Add eggs, one at a time, and beat until smooth.  Add vanilla.  Combine with the flour mixture and beat until smooth.

Scrape batter into pan, and using an offset spatula, smooth batter into a thin, even layer.  leave a small border of parchment paper around the edges.

Bake until cookie is set, about 10 minutes.  Transfer to a rack to cool completely.  Optional: evenly poke holes into the cookie like the good ol' fashioned ice cream sandwiches you find in stores.  I used a chopstick, but you can also use a meat thermometer.

When ready to assemble, remove ice cream from freezer and let soften slightly, but move quickly, as you can't work with melted, liquidy ice cream.  If you have time, I would actually suggest preparing the ice cream ahead of time: find a casserole dish or pan with some depth that is about half the size of your baking sheet that will be used to make the cookie.  Line the dish with parchment paper or plastic wrap, and then evenly spread the ice cream in the dish, creating an even layer about 1 inch thick.  Freeze until hard again, at least one hour. 

To assemble, cut the cookie in half.  If ice cream is already prepared, place layer of ice cream on top of one of the cookie halves (cut ice cream to size, as needed) and then place other cookie half on top.   If ice cream is not already prepared in shape, quickly spread a layer of ice cream on top of one of the cookie halves and top with the other.  Immediately wrap the big sandwich tightly in parchment paper to keep the shape, and freeze until firm, at least 2 hours.


Then, cut to size to serve.


My first time making these turned out okay, but not great, and definitely a bit ugly.  I did not spread the batter thinly enough, so the cookie sandwich was a bit fat.  I was also too lazy to actually measure out the size of the cookies and just eyeballed everything for the holes and the cutting, which led to uneven sized sandwiches.  Lesson learned...but at least they're edible!


Shuko

We got the kaiseki menu and had a great experience.  Overall, I think I liked the cooked dishes more than the sushi because there was so much creativity and fun flavors (loved all the sauces), but everything was good (although I think I prefer O Ya, which we tried recently, over Shuko).

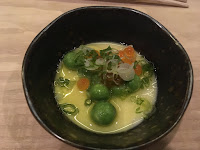
  • Chawanmushi with ikura and green peas -- this was served cold, and it was a nice and refreshing opener 
  • Dungeness crab with shaved cucumber -- a great summer dish; the saltiness of the crab (very good-sized portion of crab!) was balanced by the cool cucumber
  • Toro and caviar with Japanese milk bread -- simple and as good as everyone says; the bread was the perfect combination of chewy and crunchy, and toro and caviar need no further intro
  • Fluke with mushrooms and nori breadcrumbs -- this was pretty delicious; I loved the flavors, but only criticism might be the mushroom and sauce might have overpowered the fish a bit
  • Grilled sepia with heirloom tomatoes and creamy corn -- the sepia was perfectly cooked, and that corn was soo good
  • Hanger steak with nectarine and broccoli -- steak was a nice medium, and the salt of the steak and charred broccoli went well with the sweetness of the nectarine and sauce
  • Sushi tasting -- 17 pieces, including a their version of a spicy tuna roll (seared toro with fresh chili handroll...I'd eat that everyday) and another toro roll.  I appreciated that the sushi was served very simply and traditionally; just the fish with a bit of wasabi and brushed lightly with soy sauce; no fancy sauces here, and none needed.  Some unique pieces that you don't normally see were a red snapper that was lightly seared with the skin on and dorado.  My favorites of the night were probably the uni (super fresh and creamy) and the ocean trout, which I almost am ashamed to say was my favorite but it had such a strong and memorable flavor.  There was also a soft shell crab sushi, which didn't look all that pretty, but it was delicious -- lightly fried and very meaty. And last but not least, there was the toro from the collarbone (kama toro), which the chef scraped directly from the collarbone and then plated...yum.  The sushi tasting ended with a shiso leaf wrapped inside a lotus root.
          
  • Strawberry granita -- this was a light and refreshing dessert and a good segue into the last dessert
  • Apple pie -- I was not expecting apple pie for dessert at a Japanese restaurant, but this was one of the best apple pies I've had.  Besides the filling, I'm all about pie crust, and they had a wonderful crumble on top and a perfect crust that was neither too flaky nor felt too heavy

Heidelberg Restaurant

I've walked by this place so many times but have never been in the mood for heavy meat, but my husband picked it and I had no veto rights since it was his birthday weekend, plus I happened to be really hungry.  Long story short, I'm glad we finally tried it.  We both really enjoyed everything.

  • Schnitzel a la Holstein -- schnitzel with a fried egg and anchovies; the schnitzel itself was nicely fried.  Fried just enough to be crispy but still tender and not dry on the inside or greasy on the outside.
  • Bratwurst -- seared pork sausage; tasted good, but not sure why one single sausage costs $19.75
  • Gebratene Ente -- roast duckling; I'm very picky about my duck, and this exceeded expectations.  It was very tender and juicy.

We wanted to try the black forest cake for dessert, but they ran out (but we were told it's very good), so perhaps we will have to come back and try that next time.

Sunday, August 13, 2017

Buttermilk Fried Chicken Recipe

Fried chicken...the all American classic.  Serve it with some waffles and make it brunch!

Ingredients
3 1/2 pounds chicken (I like to use a mix of drumsticks and thighs only)
2-3 cups buttermilk
3 tablespoons kosher salt, more as needed
1-2 teaspoon ground black pepper, more as needed
1-2 teaspoon cayenne pepper, more as needed
1 teaspoons Slap Ya Mama cajun seasoning, optional
1 cup all-purpose flour
1/2 cup breadcrumbs
3 cups neutral oil, like canola

Directions
Marinate the chicken with 2 tablespoons salt, 1 teaspoon pepper, 1 teaspoon cayenne pepper, and 1/2 teaspoon Slap Ya Mama, if using.  Cover all pieces in buttermilk and let marinate for at least an hour and up to a day.

Combine flour, breadcrumbs, and remaining salt, pepper, and seasoning in a large bowl or a large paper bag/container large enough to fit the flour and chicken.  When ready to cook, remove chicken from the marinade and toss well in the flour mixture.

Pour oil into a large, heavy-bottomed wok or cast-iron skillet with high sides and a lid, to a depth of a few inches.  Heat oil over medium-high heat to 350F.

Shake off excess flour from chicken and fry skin-side down, for about 5-10 minutes, covered by the lid.  Remove the lid, turn over the chicken pieces, and cook for another 5-10 minutes until cooked through and a deep, golden brown.

*If you have a deep fryer, you're a lucky duck and should use it.

Transfer chicken to a paper-towel lined tray or plate.


Sausage, Egg, and Cheese Hash Casserole Recipe

This is a quick and easy crowd pleaser if you need to entertain a large party.

Ingredients
1 pound Italian sausage (e.g., hot Italian sausage or sweet Italian sausage)
1 medium white onion, peeled and diced
1 red bell pepper, cored and diced
3 cloves garlic, minced
6 eggs
1/3 cup milk
1 bag (~20 ounce) frozen hash browns, slightly thawed
2 cups (8 ounce) shredded cheese (e.g., cheddar)
Salt and pepper to taste
Optional toppings: sliced scallions, avocado

Directions
Preheat oven to 375F.

Add the sausage to a medium pan and cook over medium-high heat until browned, crumbing the sausage as it cooks.  Remove sausage and transfer to a large bowl.  Add the onion, red pepper, and garlic to the same pan, and saute until soft.  Season with salt and pepper.  Add vegetable mixture to the mixing bowl with the sausage.  Add the hash browns and half of the cheese to the mixing bowl.  Mix well.

In a separate bowl, whisk together the eggs and milk until combined.  Lightly season with pepper.  Add mixture to the hashbrown mixture, and stir to combine.  Pour into a 9x13-inch baking dish, and top with the remaining cheese.

Cover with aluminum foil and bake for 20 minutes.  Then remove the aluminum foil and bake for an additional 10-15 minutes, or until potatoes begin to slightly brown.  Remove from oven and garnish with green onions and/or sliced avocado and serve.

Belgian Waffles Recipe

I love waffles.  I'll take waffles over pancakes any day.  But I'm particular about my waffles; I love the crunch and then the airy interior.  I don't like the super soft and flimsy waffles...if I wanted that, I might as well just eat a pancake.  So here's a recipe for Belgian waffles -- thick waffles that are crispy and chewy at the same time.

Ingredients
2 cups all-purpose flour
1/2 cup sugar
3 1/2 teaspoons baking powder
2 large eggs, separated
1 1/2 cups milk
1 cup (2 sticks) butter, melted
1 teaspoon vanilla extract

Directions
Combine flour, sugar, and baking powder.  In another bowl, beat egg whites until stiff peaks form.  In a third bowl, beat egg yolks, and then add milk, melted butter, and vanilla, and mix well.  Stir in dry ingredients.  Finally, fold in egg whites into the batter.

Bake in a preheated waffle iron until golden brown.  (Be sure to butter the waffle iron or use enough cooking spray for ease of removal when done.)